2026-10-07
Where to start robotics at home (no hardware needed)?
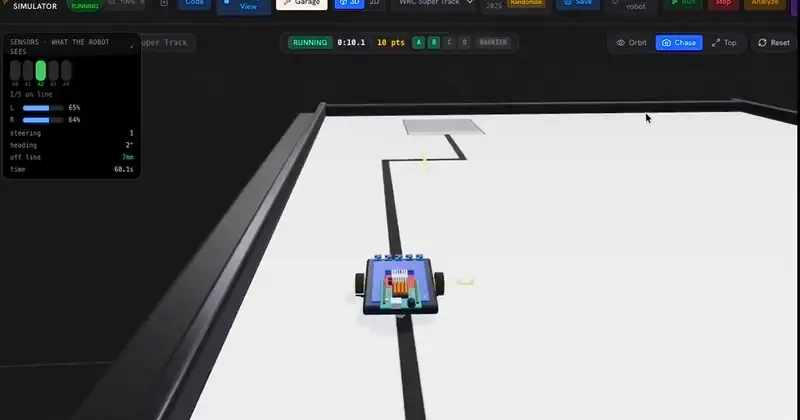
"I'd love my kid to learn robotics at home, but I have no idea where to start." If that's you, this is your article: a concrete, realistic roadmap — and best of all, it needs zero hardware to begin.
Step 0: Set expectations right
Before starting, three things parents should know:
- Robotics isn't one subject — it's three meeting: electronics (how circuits work), programming (how to command machines), and systems thinking (how to put it together). Your kid doesn't need all three at once — take them one at a time.
- 8 is a sweet spot to start. Younger and reading stamina usually isn't there for text code yet; older is totally fine too, just move a bit faster.
- You don't need to know code. Your job is fellow traveler — the one who asks "wow, how did you do that?" — not the teacher. Any good learning platform explains itself to the child.
Phase 1: Meet the circuit (weeks 1–2)
One goal only: your kid lights up an LED and understands why it lights.
Sounds trivial, but one LED contains a universe: power, positive and negative terminals, the resistor protecting the LED, the idea of a closed loop. Don't lecture first — let them wire it in a simulator, hit run, watch it glow. Then ask: "what do you think happens if we remove this resistor?" Let them try. (In simulation a "burned" LED costs nothing — that's the beauty of it.)
Ready to move on when: they can wire the LED circuit without looking at instructions.
Phase 2: Command it with code (weeks 3–6)
Once wiring feels natural, make the circuit obey with code. Start with the simplest commands:
- Turn the LED on/off in code (
digitalWrite) - Blink to a rhythm (loops +
delay) - Read a button: pressed = on, released = off (
digitalRead+if)
If your kid has done Scratch, this is the perfect moment for the bridge: show them the familiar block next to each line of code. Every block they've dragged is real code — realizing that dissolves most of the fear of text programming.
Ready to move on when: they can write "blink 3 times on button press" from memory, no copying.
Phase 3: Sensors — giving the robot senses (weeks 7–10)
What separates a robot from a circuit: it senses the world. Introduce 2–3 sensor types:
- Ultrasonic sensor: measures distance — the robot's eyes for avoiding obstacles.
- Infrared sensor: sees black/white lines — the eyes of a line-following robot.
- Potentiometer/knob: adjusts speed or brightness — the idea of continuous input.
Best project for this phase: a "burglar alarm" — something approaches, it sounds. Your kid combines a sensor (input), comparison logic (code), and a buzzer/light (output). That's a complete miniature robotics system.
Phase 4: The whole robot (from month 3)
Now they have all the pieces: circuits + code + sensors. Time to assemble:
- Line-follower robot: IR sensors to track a line.
- Obstacle avoider: ultrasonic sensor to turn away from barriers.
- 3D track challenges: run the robot through checkpoints.
This is the phase kids love most — the first time their creation moves. Let them show off: film it, call the grandparents. Recognition at this age fuels the entire next year of learning.
How much per week is enough?
Less than you'd think: 2–3 sessions a week, 20–30 minutes each is the golden rhythm. Robotics is a "steeping" subject — the brain needs rest between sessions to connect concepts. Two hours crammed on Sunday works far worse than 25 minutes on Tuesday, Thursday, Saturday evenings.
And one unbreakable rule: stop while they're still having fun. End a session mid-excitement and they'll ask for more tomorrow. End it past boredom and you'll have to beg.
Common mistakes to avoid
- Buying an expensive kit on day one. (Covered in depth in our kit article — in short: skills before gear.)
- Theory before practice. With kids, the order must be reversed: build first, understand after. Theory only lands once they're asking "why."
- Comparing with other kids. A curious child goes much further than a pressured one.
- Doing it for them when they're stuck. Fifteen stuck minutes is normal — it's when the brain works hardest. Ask guiding questions instead of giving answers.
Don't know where to start? ManuStem lays out exactly this 4-phase path: 28 lessons from first LED to the Graduation Robot, all in the browser — no kit to buy, nothing to install. First 4 lessons free at stem.manusignal.com.